Orchestrate human tasks
In the previous chapter, a service task handed work to a worker you wrote. Many processes also need a step that waits for a person — an approval, a review, a form to fill in. In BPMN that's a user task, and this chapter shows how to drive one with the engine.
The key difference: a service task is completed by a worker that polls the engine; a user task is completed by your application (or a person through the UI) calling the engine when the human is done. At the engine level both are jobs, and both are reachable through the REST /jobs API — but for a service task you'll typically use the gRPC worker SDK instead, since polling and retries are exactly what it's built for. This chapter drives a user-task job with plain REST calls, no worker needed.
The engine running locally and the examples repo cloned, as set up in Run the engine. No worker is needed this time — you'll play the human.
What you'll build
A minimal approval process: a request comes in, a person approves or rejects it, done.
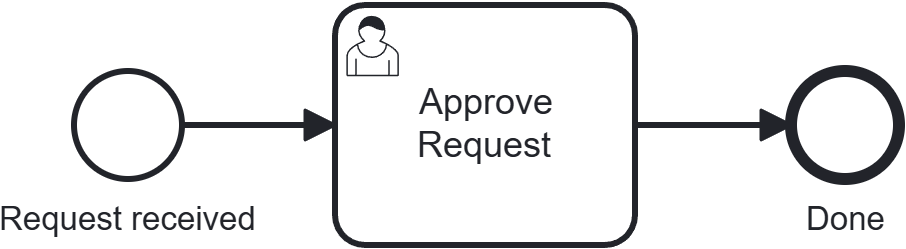
This chapter's process is approval-process.bpmn. From getting-started/, move into the chapter folder:
cd 03-orchestrate-human-tasks
In the BPMN, the human step is a plain <bpmn:userTask> element. Unlike a service task, ZenBPM needs no extension markup to recognize it: reaching any user task always creates a job of the fixed type user-task-type and waits — that's all approval-process.bpmn relies on here.
You can optionally route a user task to a specific person or group right in the model, with a native <zenbpm:assignmentDefinition assignee="..." candidateGroups="..." /> extension element — see User task for the full attribute reference. This tutorial assigns at runtime instead, over REST, in Step 3 below, which is why approval-process.bpmn carries no extension elements at all.
Step 1: Deploy and start
Deploy the process and start an instance, exactly as in the previous tutorial:
# Deploy
curl -X POST http://localhost:8080/v1/process-definitions \
  -F "resource=@approval-process.bpmn"
# -> note the returned processDefinitionKey

# Start an instance
curl -X POST http://localhost:8080/v1/process-instances \
  -H "Content-Type: application/json" \
  -d '{"processDefinitionKey": <PROCESS_DEFINITION_KEY>, "variables": {}}'
# -> note the returned processInstanceKey
Query the instance — it's active, because the token has reached the user task and is waiting for a person:
curl http://localhost:8080/v1/process-instances/<PROCESS_INSTANCE_KEY>
Step 2: Find the pending task
User tasks are jobs of the fixed type user-task-type. List the ones waiting to be worked on:
- cURL
- Java
- Go
curl "http://localhost:8080/v1/jobs?processInstanceKey=<PROCESS_INSTANCE_KEY>&jobType=user-task-type&state=active"
// zenbpm: the injected ZenbpmClientService (see Client Libraries) that supplies the configured ApiClient.
// JobApi is generated from the OpenAPI spec; construct it with the ApiClient.
JobApi jobApi = new JobApi(zenbpm.getApiClient());
Long processInstanceKey = 0L; // set this to the processInstanceKey from Step 1
JobPartitionPage jobs = jobApi.getJobs(
    /* processInstanceKey */ processInstanceKey,
    /* jobType */ "user-task-type",
    /* assignee */ null,
    /* state */ "active",
    /* page */ 1,
    /* size */ 10,
    /* sortBy */ null,
    /* sortOrder */ null
);

// jobApi and jobKey are reused in the assign/complete examples below.
Long jobKey = jobs.getPartitions().get(0).getItems().get(0).getKey();
ctx := context.Background()
restClient, _ := zenclient.NewClient("http://localhost:8080/v1")
processInstanceKey := int64(0) // set this to the processInstanceKey from Step 1
jobType := "user-task-type"
state := zenclient.JobStateActive
resp, _ := restClient.GetJobs(ctx, &zenclient.GetJobsParams{
    ProcessInstanceKey: &processInstanceKey,
    JobType:            &jobType,
    State:              &state,
})
defer resp.Body.Close()

// ctx, restClient, and jobKey are reused in the assign/complete examples below.
var jobs zenclient.JobPartitionPage
json.NewDecoder(resp.Body).Decode(&jobs)
jobKey := jobs.Partitions[0].Items[0].Key
The response lists each waiting task with its key, the elementId (Activity_1dyxkwc for this process's user task), the processInstanceKey, and its inputVariables — empty here, since the process was started with no variables and the task has no input mapping, but this is where you'd find whatever data a real process passed in for the person to act on. Note the job key; you'll use it next.
Step 3: Assign the task
Claiming a task records who is responsible for it. In a real app this happens when a user opens the task in their inbox.
- cURL
- Java
- Go
curl -X POST http://localhost:8080/v1/jobs/<JOB_KEY>/assign \
  -H "Content-Type: application/json" \
  -d '{"assignee": "john.doe"}'
// Reuses jobApi and jobKey from Step 2.
// AssignJobRequest follows openapi-generator's default naming for this endpoint's request body;
// check your installed zenbpm-java-client version if it doesn't resolve.
jobApi.assignJob(jobKey, new AssignJobRequest().assignee("john.doe"));
// Reuses restClient, ctx, and jobKey from Step 2.
restClient.AssignJob(ctx, jobKey, zenclient.AssignJobJSONRequestBody{
    Assignee: "john.doe",
})
A successful assign returns 204 No Content.
Step 4: Complete the task with a decision
When the person is done, complete the job. The variables you send become part of the process instance — this is how the human's decision flows into the rest of the process (for example, a later gateway could branch on approved).
- cURL
- Java
- Go
curl -X POST http://localhost:8080/v1/jobs/<JOB_KEY>/complete \
  -H "Content-Type: application/json" \
  -d '{"variables": {"approved": true}}'
// Reuses jobApi and jobKey from Step 2.
// CompleteJobRequest follows openapi-generator's default naming for this endpoint's request body;
// check your installed zenbpm-java-client version if it doesn't resolve.
jobApi.completeJob(jobKey, new CompleteJobRequest()
    .variables(Map.of("approved", true)));
// Reuses restClient, ctx, and jobKey from Step 2.
restClient.CompleteJob(ctx, jobKey, zenclient.CompleteJobJSONRequestBody{
    Variables: &map[string]any{"approved": true},
})
The token advances to the end event. Query the instance again — it's now completed, and its variables include the approved decision you submitted:
curl http://localhost:8080/v1/process-instances/<PROCESS_INSTANCE_KEY>
Where the form comes from
ZenBPM doesn't dictate a form format at the engine level: a user-task job's inputVariables are just whatever the process passed in, and completeJob accepts whatever variables your app sends back. Rendering an actual form for the person is entirely up to your application.
The convention used across the ZenBPM ecosystem — including the ZenBPM UI and the Contract Closing & Commission Settlement showcase in this repo — is to carry a bpmn-io form JSON schema in a job variable conventionally named ZEN_FORM. In that showcase, the backend keeps one schema file per task (process/forms/<ElementId>.json, e.g. UT_ManagerApproval.json) and injects it into the job's inputVariables under ZEN_FORM if the process itself doesn't already supply one; the frontend reads that same variable name to render the form.
approval-process.bpmn here doesn't attach a form — Step 4's curl stands in for "submit the form" — but this is the pattern you'd follow to build a real task inbox.
Rejecting, and where your app fits
Completing with {"approved": false} is a perfectly normal outcome — "reject" is a decision, not an error, so you still complete the job (with a different variable) rather than failing it. Reserve POST /jobs/{jobKey}/fail for genuine failures (a downstream system was unreachable, invalid data), which mark the job as failed and create an incident — see Jobs for the full failure and retry model.
In a real system you don't call these endpoints by hand. Your application backend:
- lists user-task jobs (Step 2) to build each person's task inbox,
- assigns a task when someone opens it (Step 3),
- renders the task's form (see above), and on submit completes the task with the entered variables (Step 4).
The engine stays the source of truth for what's pending and what was decided; your app is just the human-facing surface — and the ZenBPM UI is one ready-made such surface.
Next steps
- A realistic process. The Contract Closing & Commission Settlement showcase combines several user tasks with a service task and an exclusive gateway (branching on a business-rule-task result), each user task backed by a real
ZEN_FORM. - The concepts. BPM Concepts → tasks explains user vs. service tasks and the job model.
- The full API. The
/jobsendpoints in the REST reference.